How to Make Compost Faster at Home: The Proven 2–3–4 Method That Actually Works
Most people wait 4 to 6 months for compost that should be ready in 4 to 6 weeks.
I used to be one of them. The bin sat there, barely heating up, smelling faintly off, and breaking down so slowly I would give up and dump it.
It was not a composting problem. It was a balance problem. And once I understood that, everything changed.
In this article I am going to show you exactly how to make compost faster at home using my 2–3–4 method—not something I invented, but something I refined over 14 years of composting in small spaces after going through scientific material and observing how experienced home gardeners actually do this in real conditions.
I have been composting kitchen waste for over 14 years in small container setups. I have helped thousands of fellow gardeners through my YouTube channel Shashi N Gautam Kitchen Gardeners (163,000+ subscribers) turn what felt like a complicated process into something predictable and fast.
Why Most Home Composting Fails
Ninety percent of composting failures come down to one thing: people do not understand the carbon-to-nitrogen ratio.
That is it. Not the bin. Not the climate. Not some missing product.
Everything in composting — the heat, the speed, the smell, the breakdown — traces back to whether your carbon and nitrogen are balanced.
So before I explain the method, let me quickly explain what these two things actually mean in practical terms:
Carbon (dry waste) — also called ‘browns’: dry leaves, cardboard torn into pieces, newspaper, dry straw, brown paper bags, wood chips
Nitrogen (wet waste) — also called ‘greens’: kitchen scraps (vegetable peels, fruit waste, coffee grounds, tea leaves), fresh grass clippings, plant trimmings
When you have too much nitrogen, the pile turns wet and starts to smell. When you have too much carbon, nothing breaks down and the pile sits cold and dry. The sweet spot is what drives fast, clean composting.
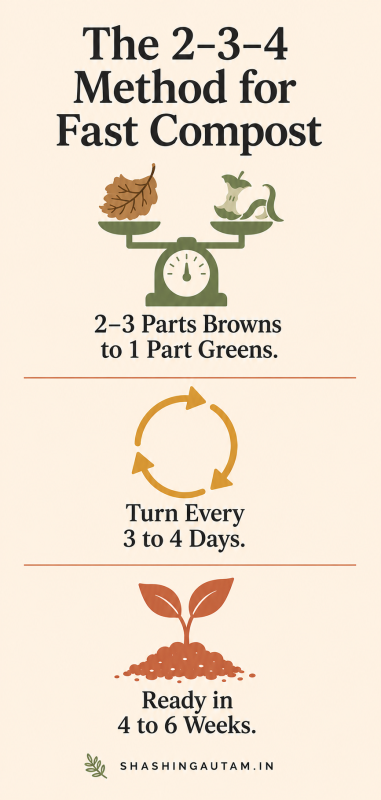
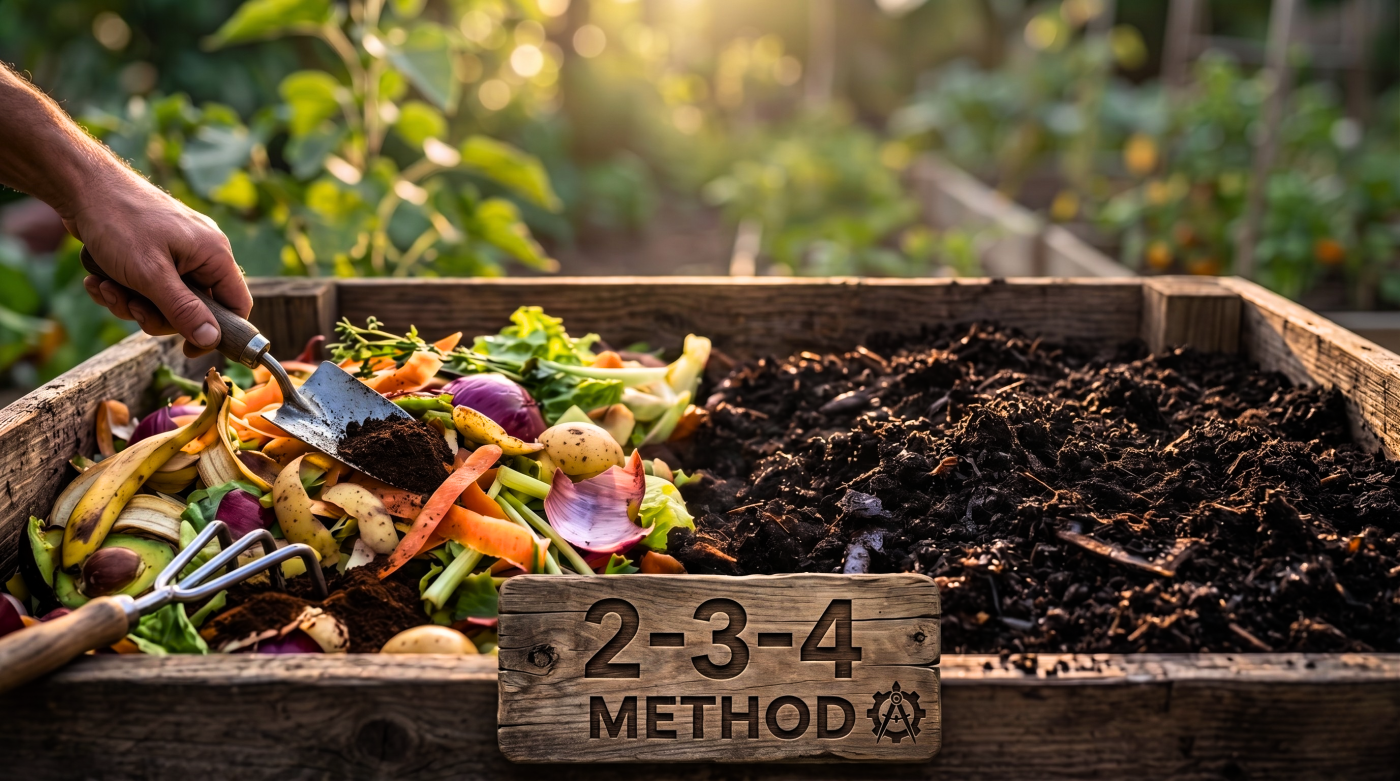
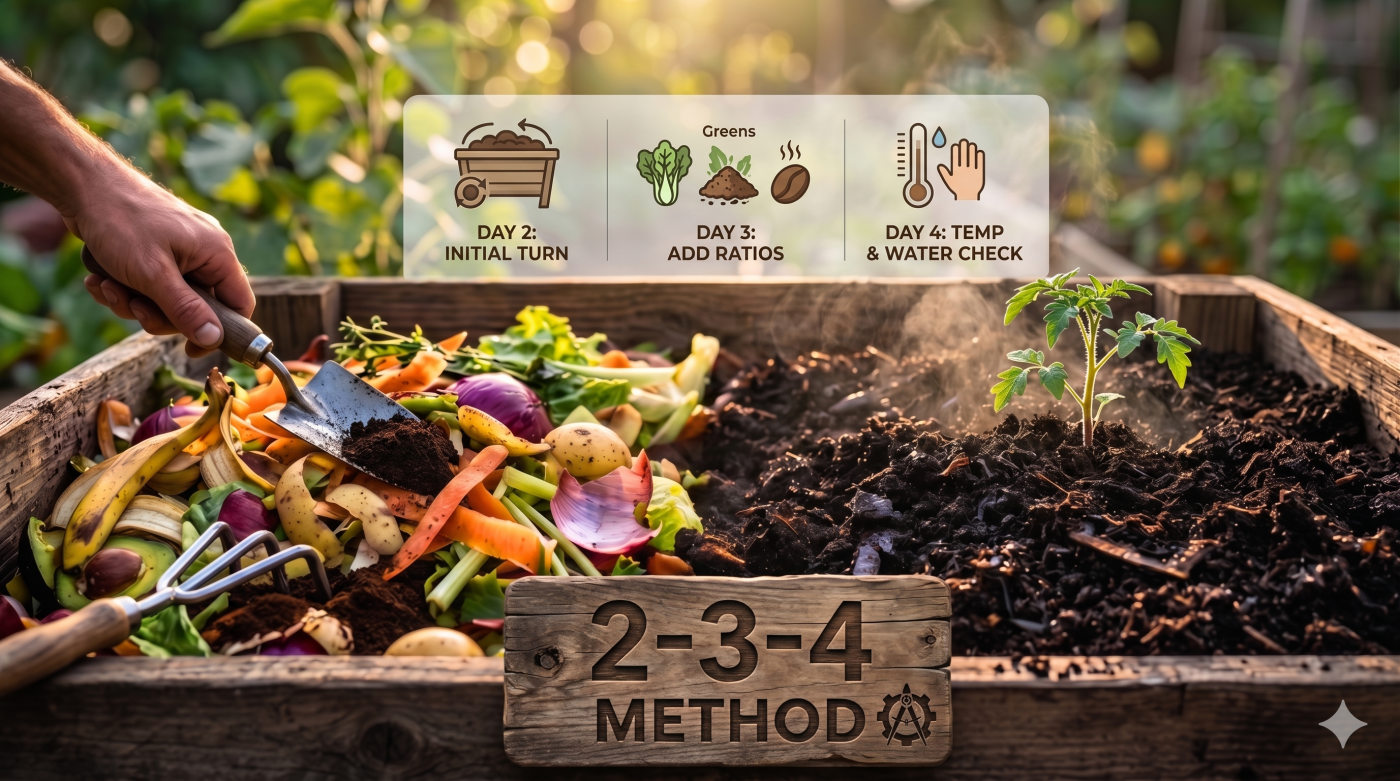
How to Make Compost Faster at Home: The 2–3–4 Method
Here is how I remember it:
• 2 to 3 parts carbon for every 1 part nitrogen (the ratio that works)
• Turn the pile every 3 to 4 days (keeps oxygen in)
• Compost ready in 4 to 6 weeks (when done correctly)
The moment I started following this consistently:
• No bad smell
• Visible heat in the pile within 3 to 5 days
• Compost that looked and felt like dark, crumbly soil in about 5 weeks
The Carbon-to-Nitrogen Ratio That Fixed Everything
This is the most important section. The carbon to nitrogen ratio is the core of how to make compost faster at home.
The ideal ratio is 3:1 — three parts dry carbon waste for every one part kitchen or nitrogen waste.
The minimum that still works is 2:1.
In practical terms, that means: for every 1 kg of kitchen scraps (peels, coffee grounds, vegetable waste), you add 2 to 3 kg of dry leaves, torn cardboard, or paper.
When I ignored this — which I did for years — here is exactly what happened:
• The pile turned wet and sticky
• A sour or ammonia smell developed within a week
• Fruit flies appeared
• Breakdown slowed to almost nothing
When I followed the 3:1 ratio:
• Pile stayed loose and earthy-smelling
• No flies
• Heat built up within days
• Breakdown was visible and predictable
The single most common mistake I see in my gardening community: people add kitchen waste every day without ever matching it with enough dry material. The bin fills up fast but never really breaks down. Start weighing or at least volume-measuring your inputs. It makes a bigger difference than any accelerator product.
Oxygen — Why Your Compost Must Stay Aerobic
Composting works as an aerobic process, meaning it needs oxygen to work correctly. When oxygen is cut off, the pile shifts to anaerobic decomposition — which produces the rotten smell most people associate with composting gone wrong.
What causes oxygen loss:
• Too much wet kitchen waste compressing the pile
• Never turning the compost
• Overfilling the bin without any structure
What fixed it for me:
• Turning the pile lightly every 3 to 4 days — not a deep dig, just a stir to let air in
• Adding dry, chunky material (torn cardboard, straw) to keep the pile loose
• Not compressing the pile when adding new material
Moisture — The Factor Most People Completely Ignore
Moisture control is one of the most overlooked factors in how to make compost faster at home
Compost needs moisture. The microbes doing the actual work need water to survive. But too much moisture is just as damaging as too little.
The test I use:
• Grab a handful of compost and squeeze it firmly
• If it feels like a wrung-out sponge — just slightly damp — that is correct
• If water drips out — too wet. Add dry carbon material immediately.
• If it is dry and dusty and nothing sticks together — too dry. Sprinkle water and mix.
I check moisture every 2 to 3 days in warm weather. In hot summers I check daily. Once you do this a few times it becomes instinct — you can feel when the pile is right.
Composting in Extreme Heat: What I Got Wrong
I assumed that putting my compost bin in direct sunlight would speed things up. More heat from outside, faster breakdown inside. That logic made sense to me.
What actually happened was the opposite.
In hot weather—anything above 40°C (104°F)—direct sunlight dried the pile out faster than the microbes could work. Moisture dropped within a day. Activity slowed. The pile just sat there, hot on the outside and completely inactive inside.
What worked:
• Placing the bin in partial shade (morning sun, afternoon shade)
• Checking moisture every day in peak summer
• Covering the top loosely with a piece of burlap or an old towel to reduce evaporation
Important: Heat alone does not speed up composting. The formula is moisture + microbes + balance = speed. External heat without moisture just kills the process.
A note for gardeners in colder climates like the USA: composting slows significantly below 10°C (50°F) as microbial activity drops. In winter, move the bin to a sheltered spot, reduce turning frequency, and expect a longer timeline. The process does not stop — it just slows down. Resume normal management when temperatures climb in spring.
Particle Size — Smaller Pieces Break Down Faster
This one is simple but consistently overlooked.
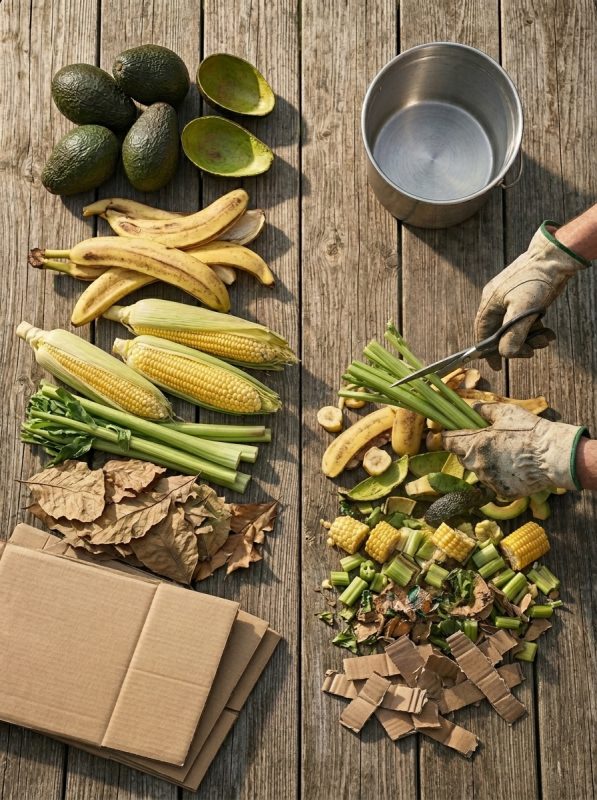
When I started roughly chopping kitchen waste before adding it—breaking large peels, cutting up stems, and tearing cardboard into smaller pieces—the breakdown noticeably sped up.
You do not need to shred everything finely. A rough chop is enough. The goal is to increase surface area so the microbes have more to work with.
Large, intact pieces like whole avocado skins or unbroken corn cobs can take months to break down on their own. Cut them first.
What to Add — and What to Keep Out
Getting the ratio right matters a lot less if you are adding the wrong materials.
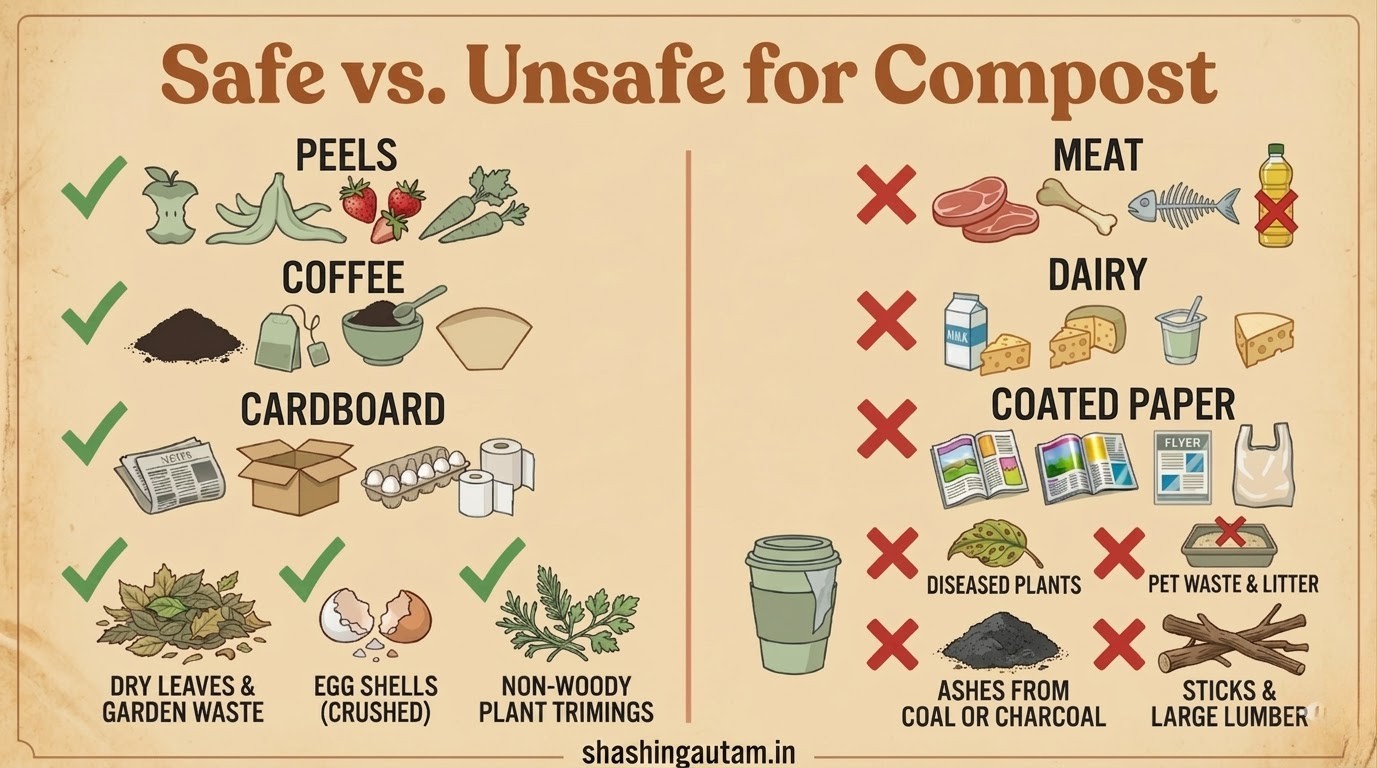
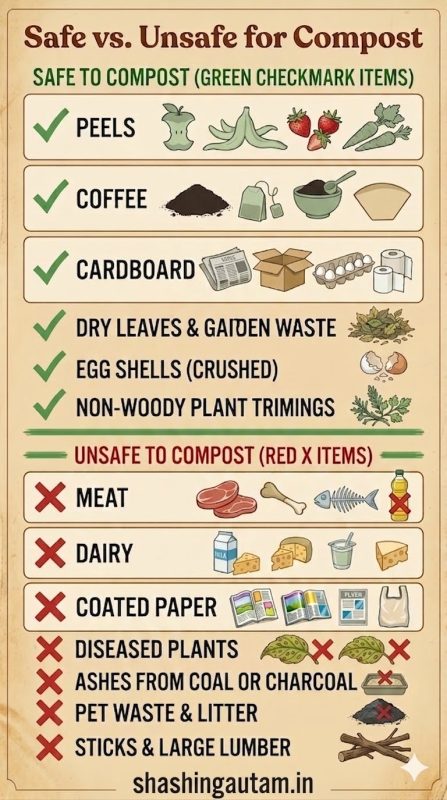
Safe to compost:
• Vegetable and fruit peels, cores, and scraps
• Coffee grounds and paper filters
• Tea leaves and bags (remove staples)
• Eggshells (crush them — they are slow to break down whole)
• Dry leaves, straw, dried plant stems
• Torn cardboard and newspaper (uncoated, no glossy print)
• Grass clippings (thin layers only — they compact fast)
Do not add these:
• Meat, fish, or bones — they attract pests and create persistent odour
• Dairy products — same problem as meat
• Cooked food with oil or seasoning — slows breakdown and attracts animals
• Diseased plant material — pathogens can survive and spread back to your garden
• Pet waste — pathogen risk
• Citrus peels in large quantities — fine in moderation, but in excess they can inhibit microbial activity and slow the pile down
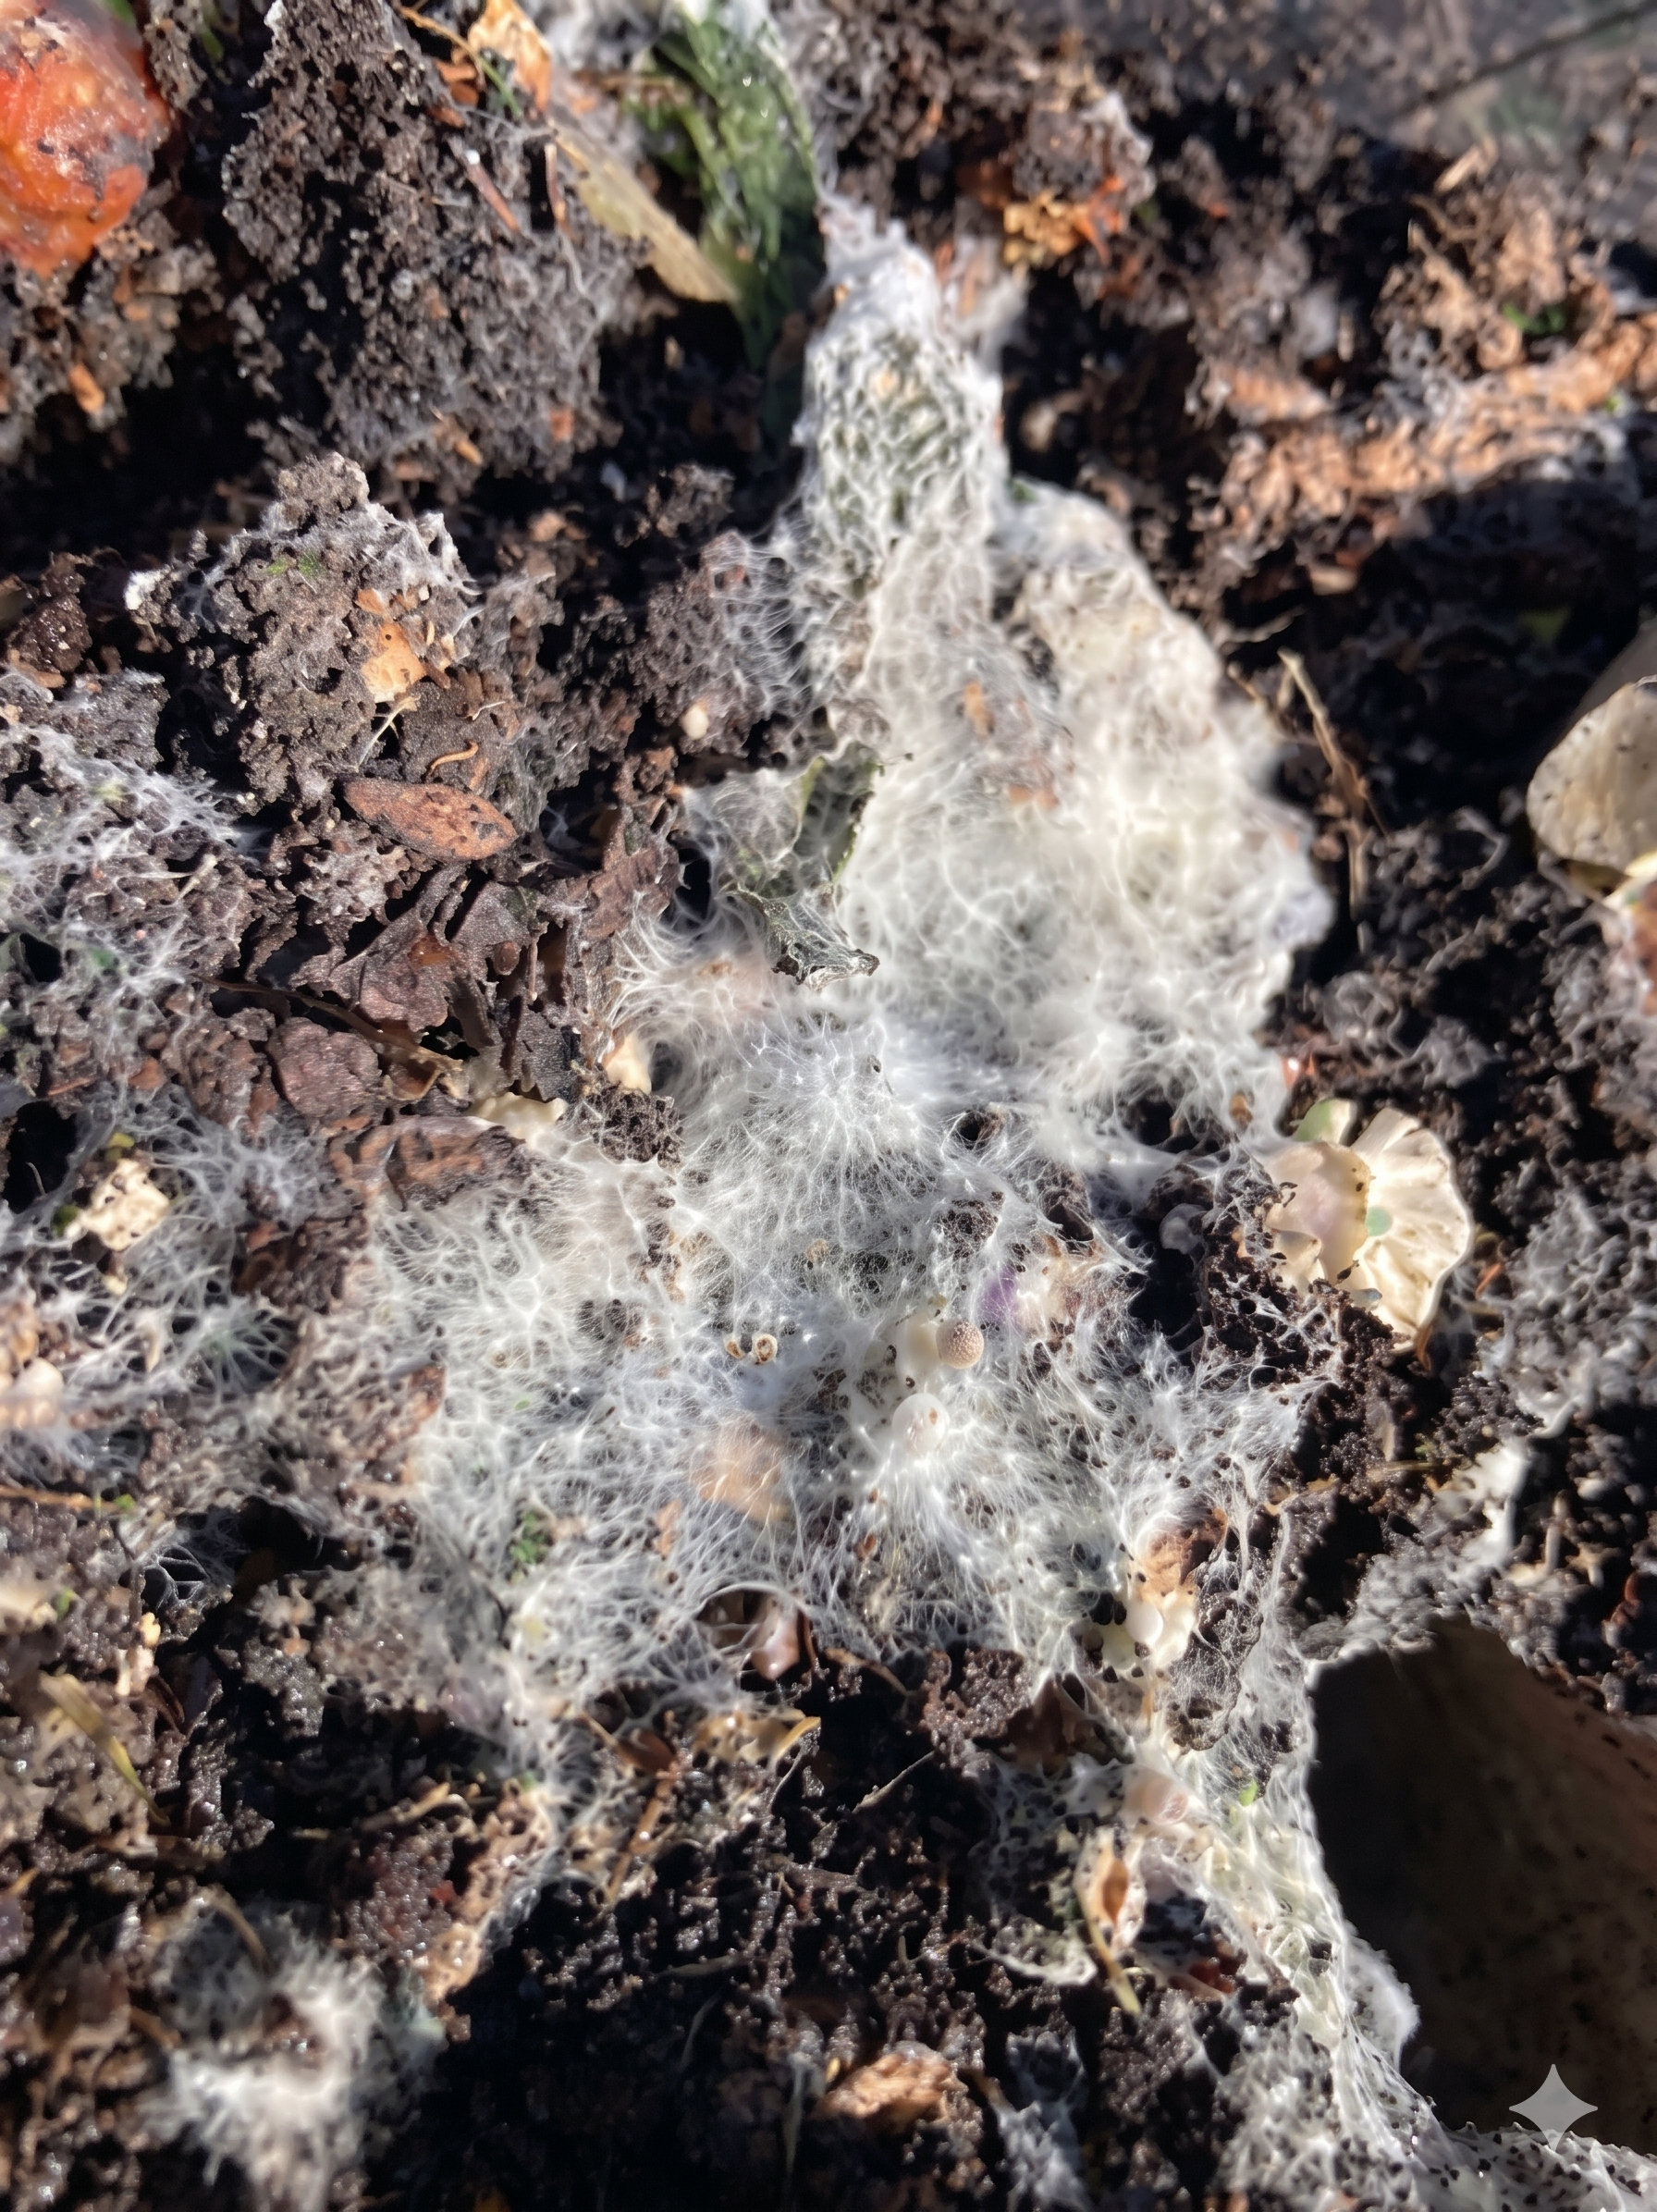
Day 7 to 10
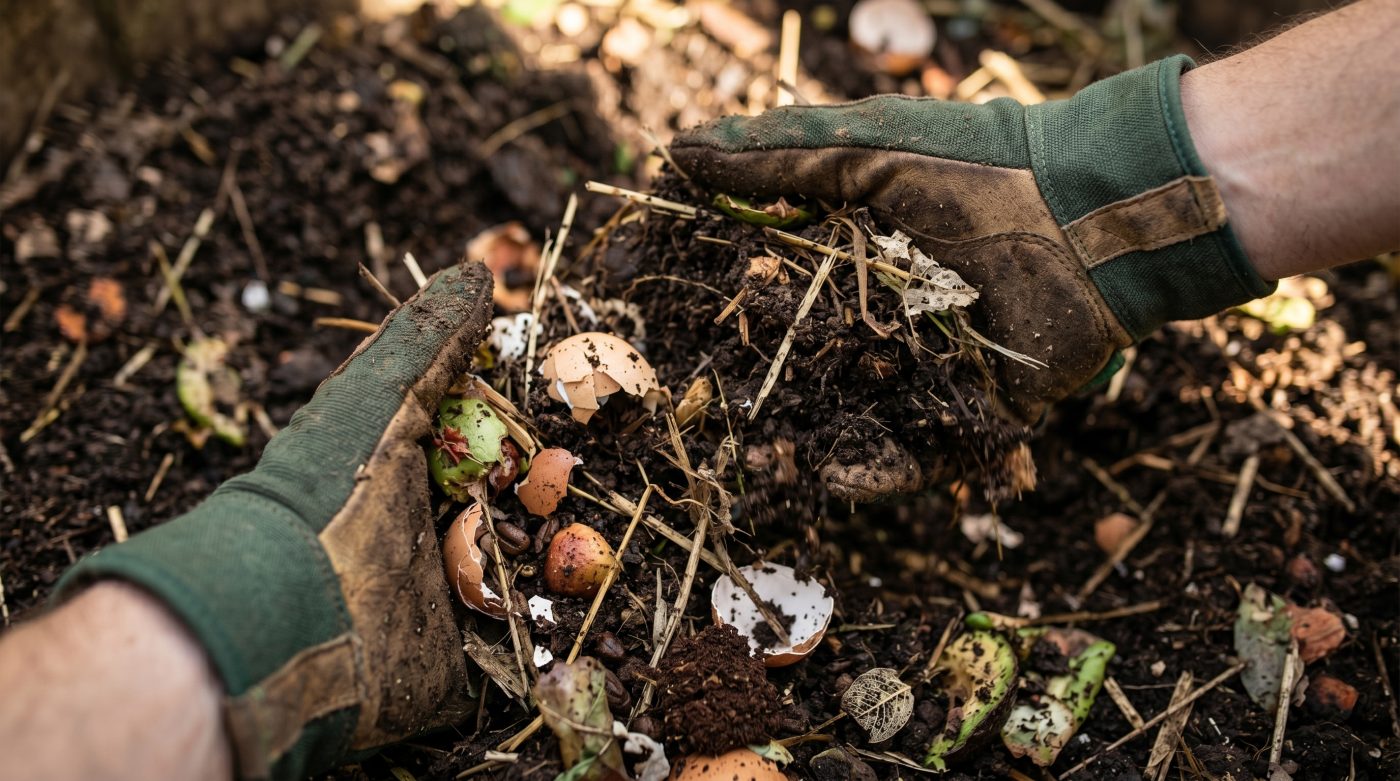
White fungal threads (mycelium) appears
The Compost Timeline: What You Should Actually See
This is what I consistently observe when composting is working correctly:
• Day 3 to 5 — you feel slight warmth when you put your hand into the center of the pile
• Day 7 to 10 — white fungal threads (mycelium) appear. This is good. It means the breakdown is active.
• Day 12 to 15 — the material starts visibly collapsing. Volume drops.
• Day 20 to 25 — original waste is no longer recognizable
• Peak phase — internal temperature can reach 50 to 70°C (122 to 158°F). This is the hot composting phase that kills weed seeds and pathogens.
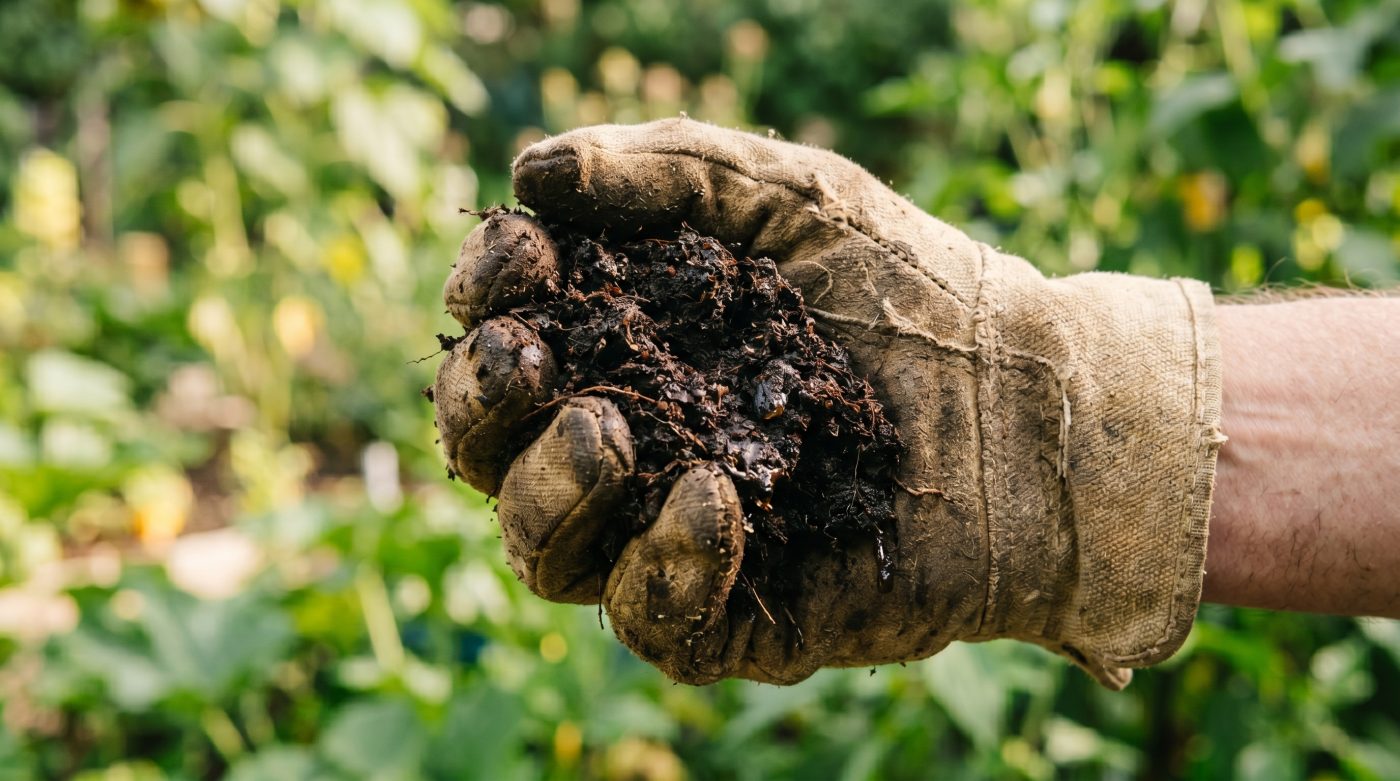
• Day 30 to 40 — dark, crumbly, earthy-smelling compost that is ready to use
If your pile is not heating up by Day 5 to 7, something is out of balance. The most common reasons are: not enough nitrogen (too dry, too much carbon), moisture too low, or pile too small to generate heat (a pile smaller than 3 cubic feet rarely heats up properly).
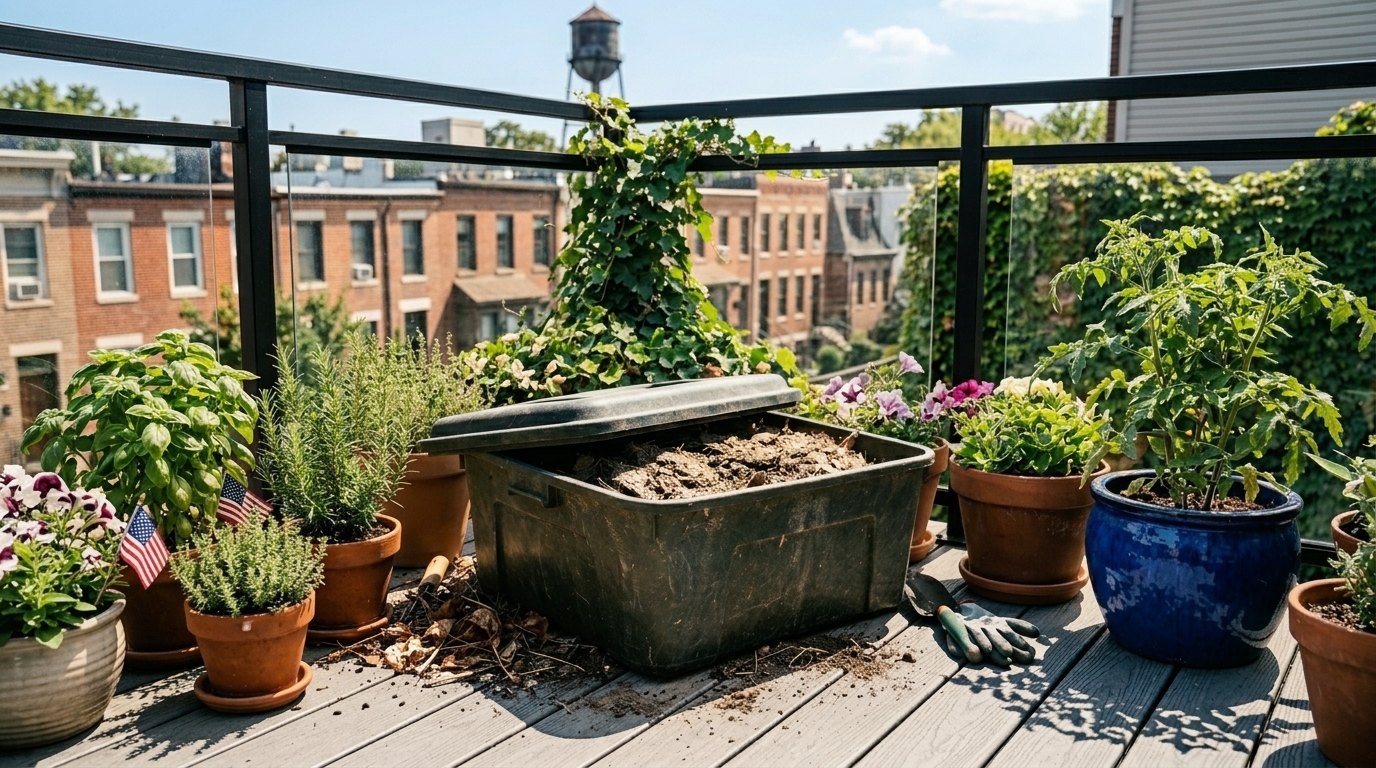
What Container to Use
I get this question constantly. The honest answer is: the container matters less than the method.
I have composted in all of these with good results:
• A large clay pot with drainage holes (worked well for small batches)
• A wooden crate lined with hardware mesh (good airflow, my current favourite)
• Stacked bricks with gaps left between them for aeration
• A purchased rotating tumbler (faster in theory, but needs good ratio management just like any other method)
The right container helps but knowing how to make compost faster at home starts with what you put in, not what you put it in.
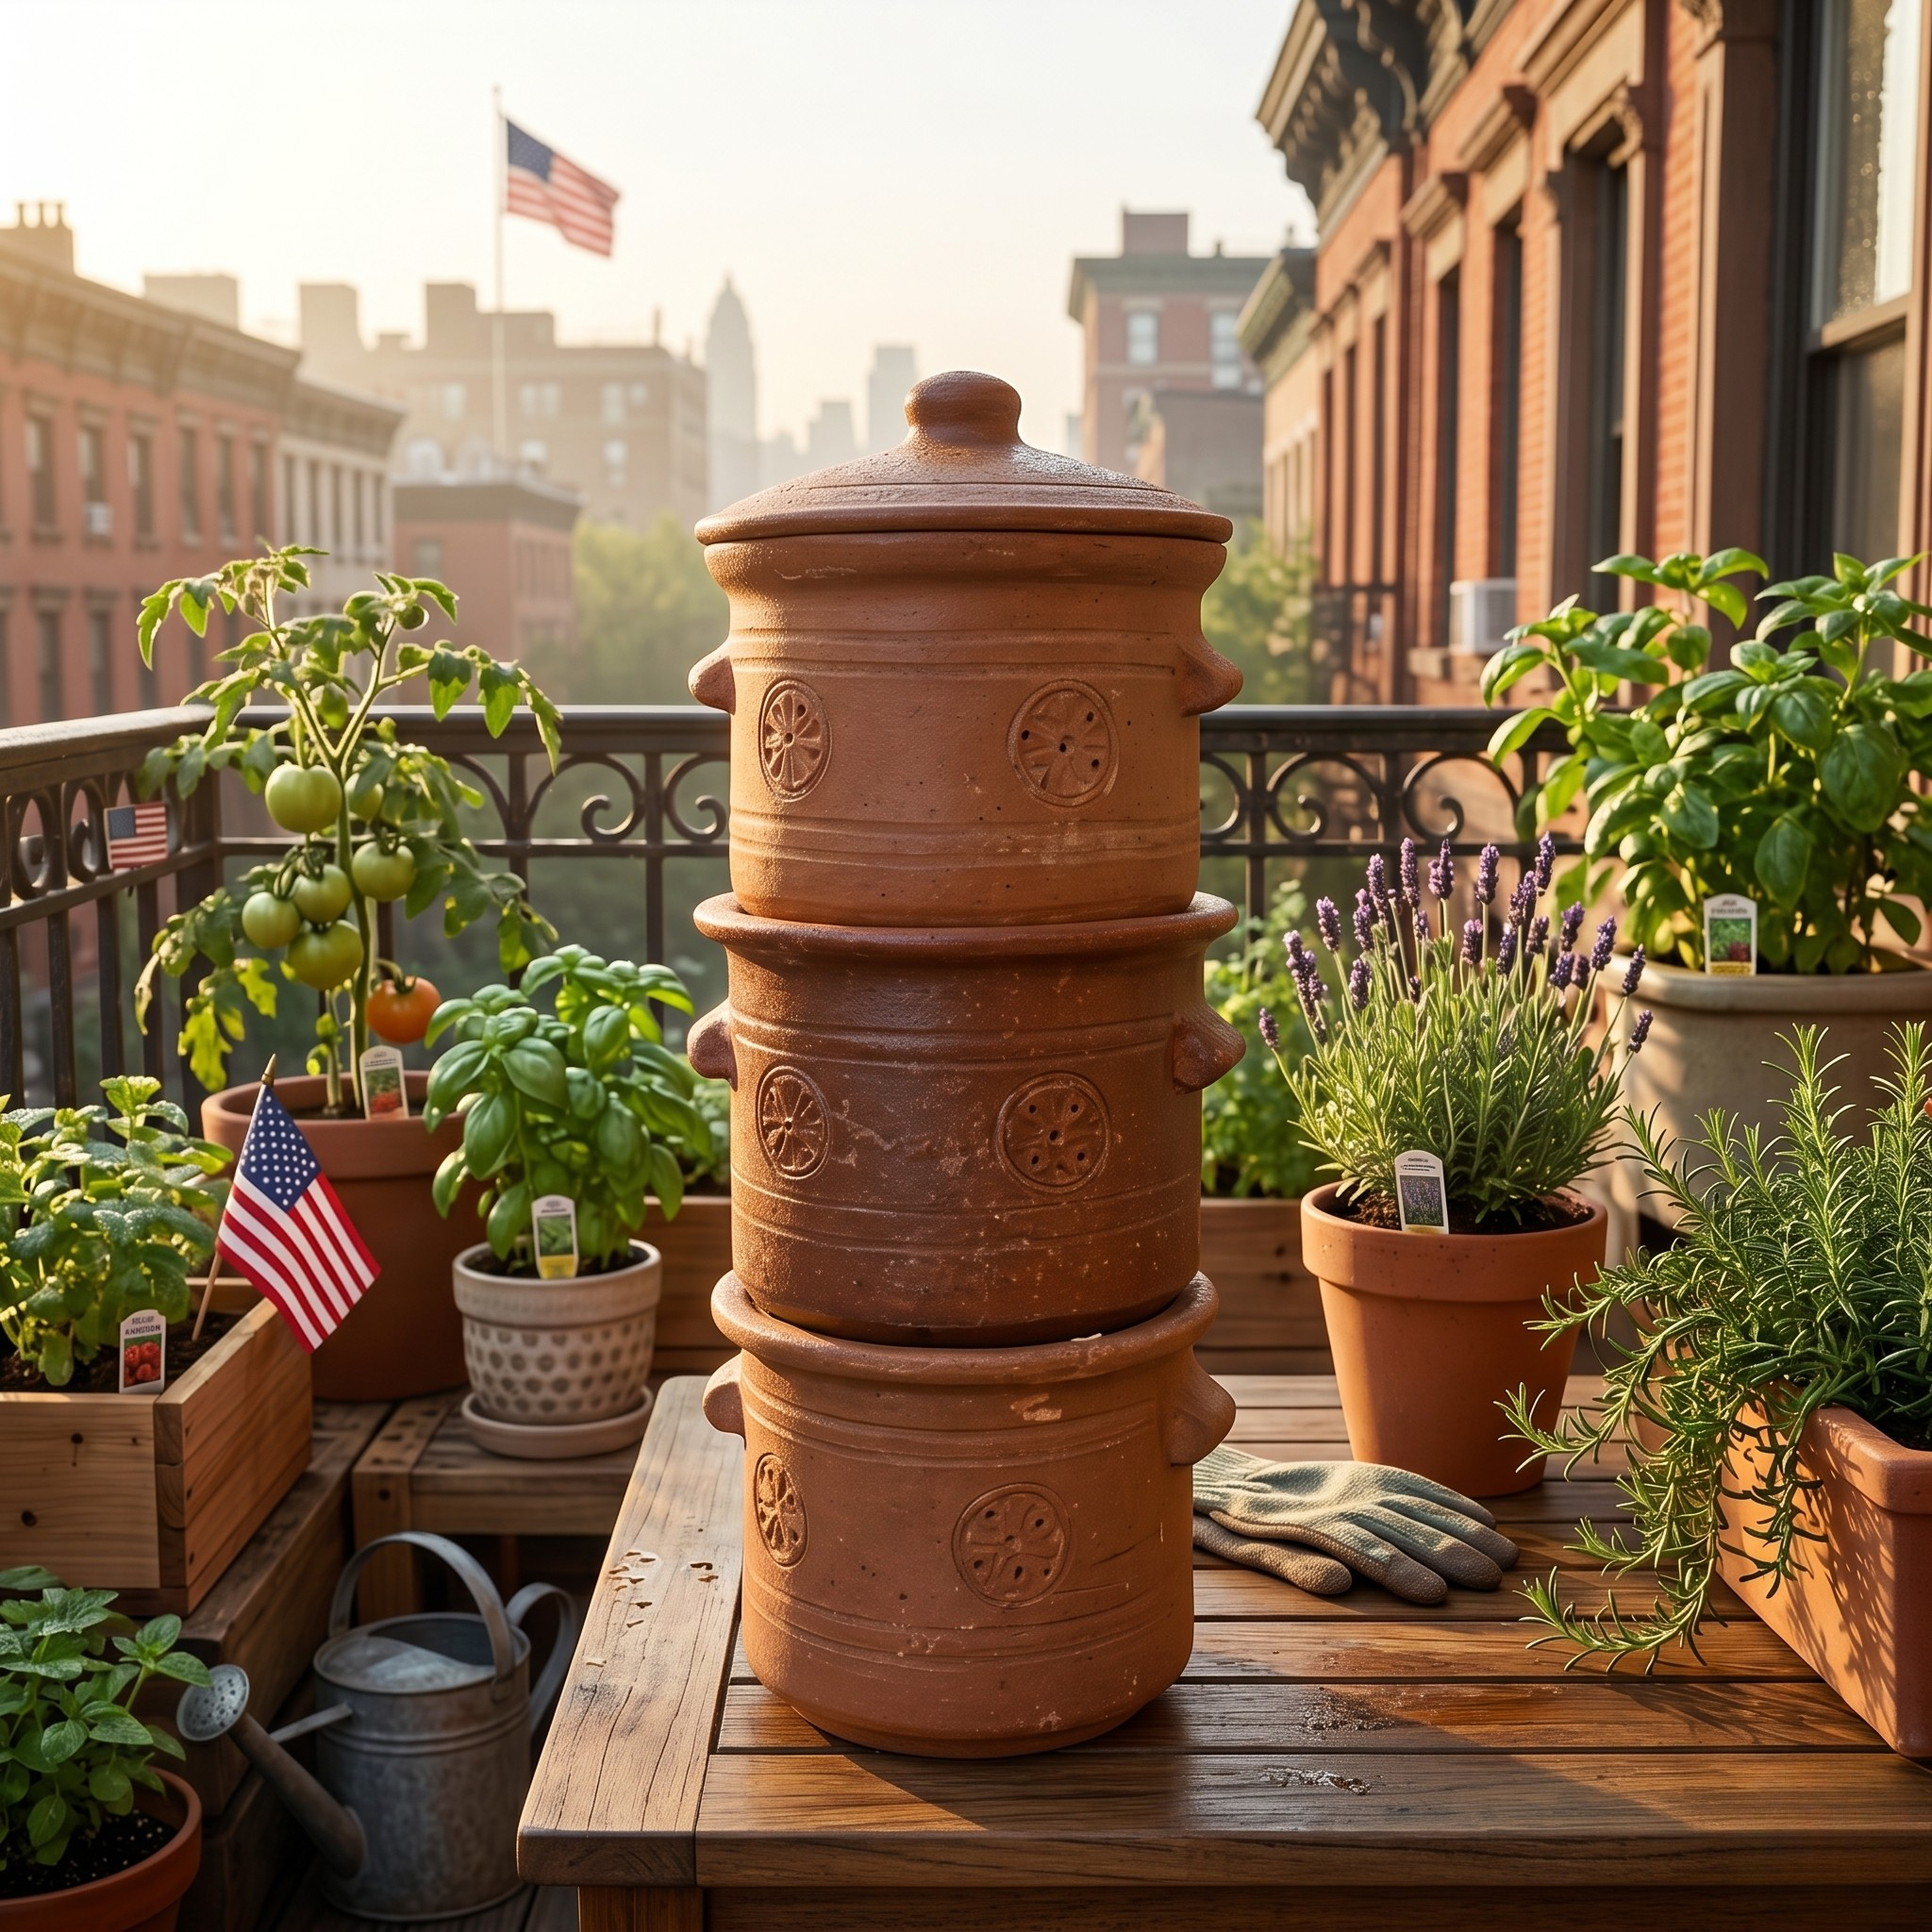
Teracotta Compost maker
For small spaces
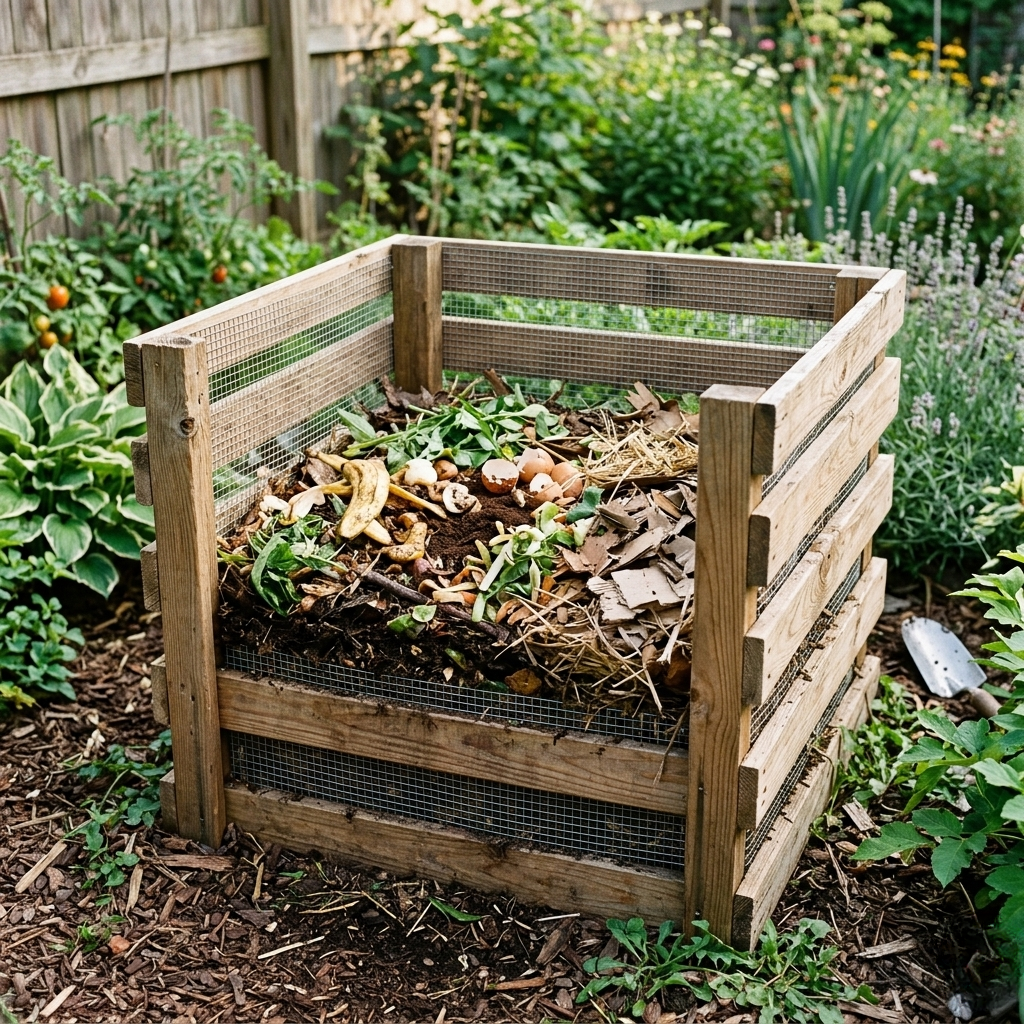
Wooden crate composter
For backyard
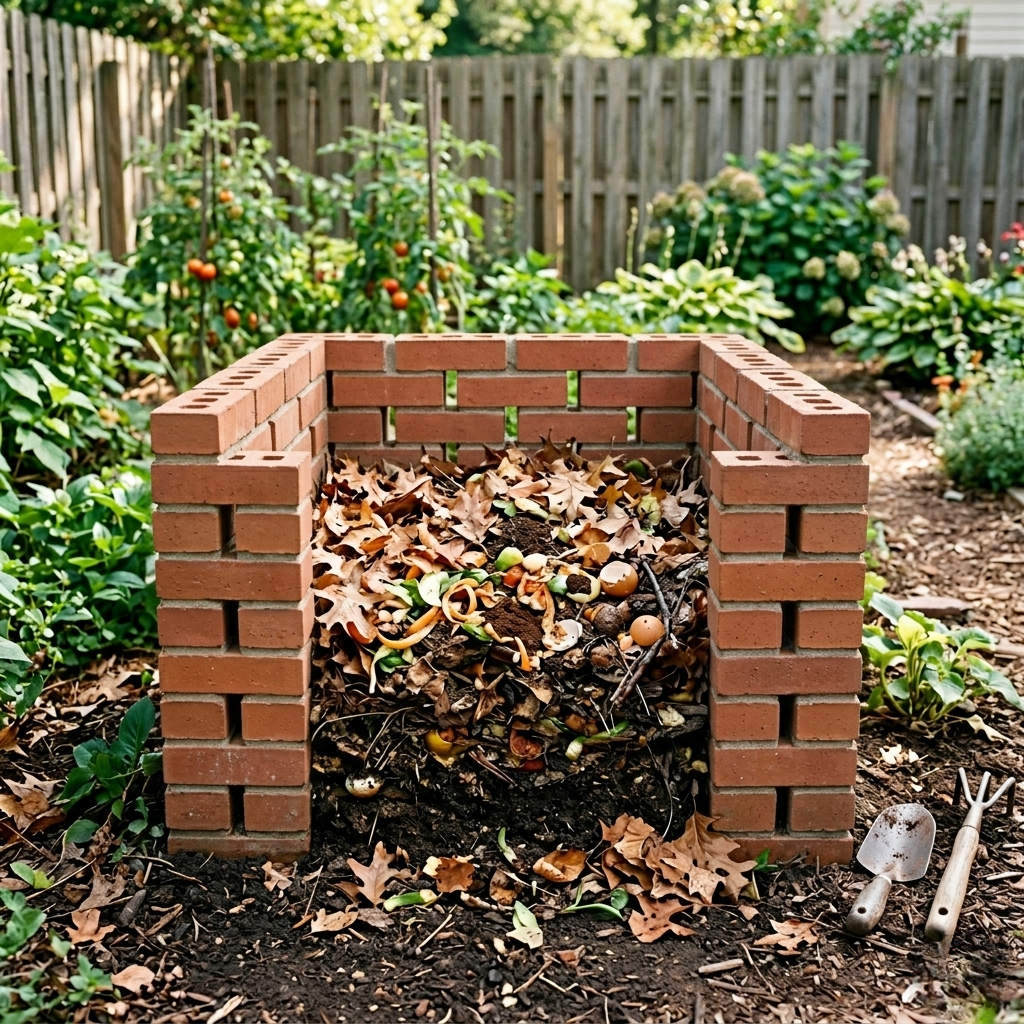
Brick composter
For backyard garden
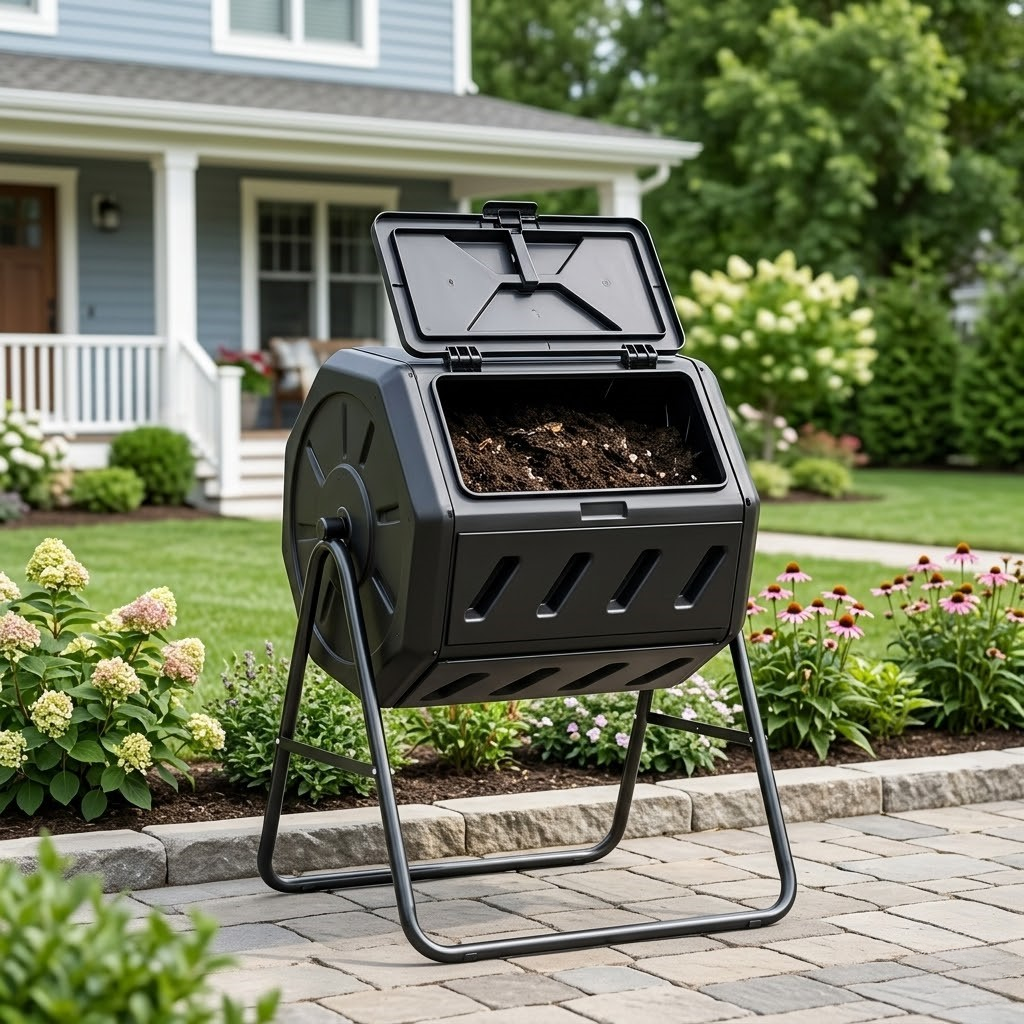
The Rotating Compost Tumbler
For modern home
The minimum I would recommend: a container that holds at least 1 cubic foot of material, has some form of aeration (holes or gaps), and has a cover or lid to retain moisture and keep pests out.
Open piles work too, but in small urban spaces they attract more flies and pests. A contained setup with a lid is more practical for most home gardeners.
🌿 Top Rated Home Composter on Amazon
- Outdoor Tumbling Composter –
View on Amazon
- Countertop Compost Bin –
View on Amazon
- Compost Maker for Kitchen Waste –
View on Amazon
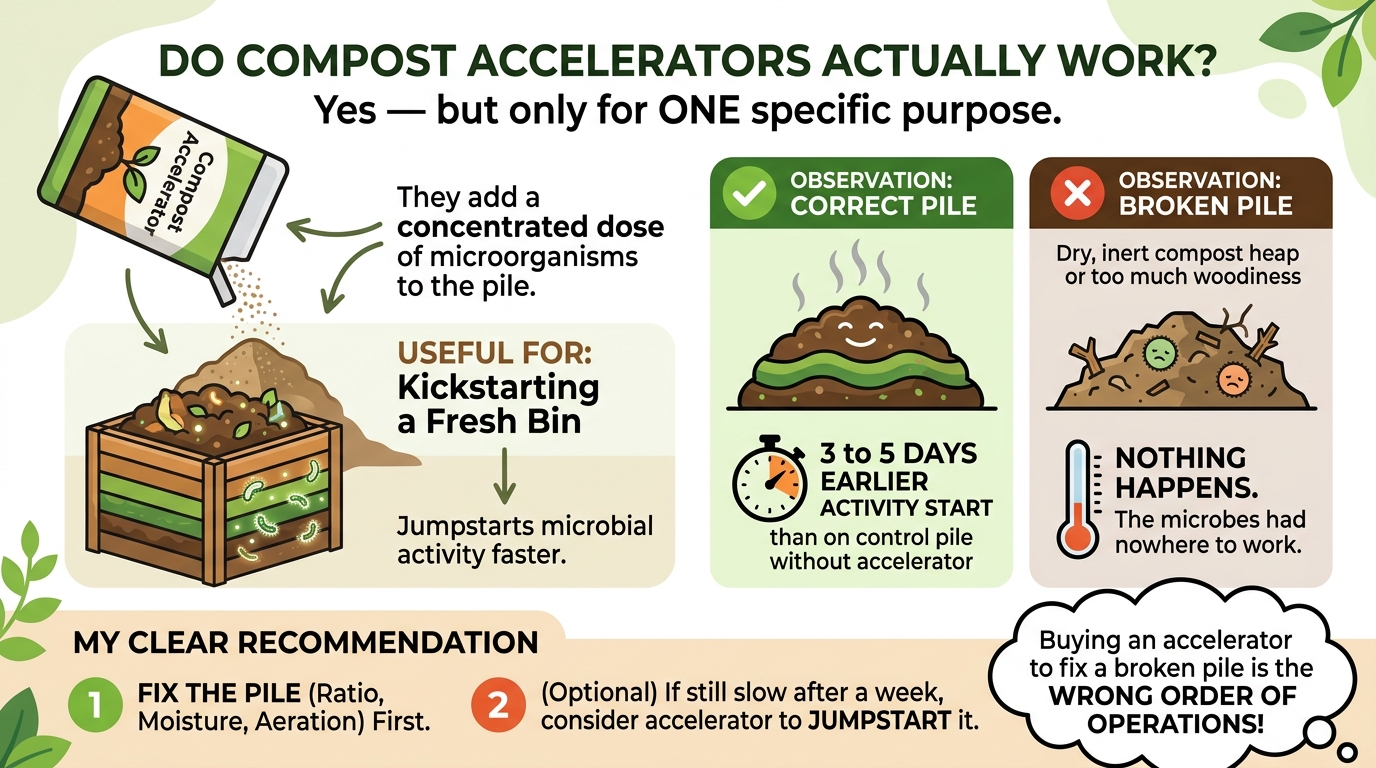
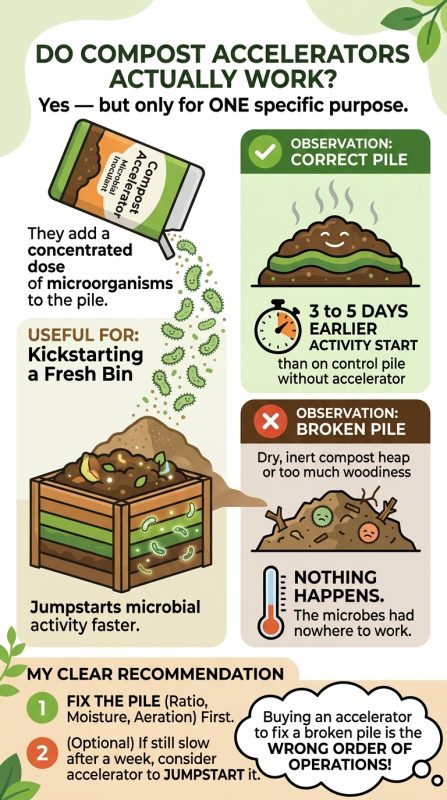
Do Compost Accelerators Actually Work?
Yes — but only for one specific purpose.
Accelerators add a concentrated dose of microorganisms to the pile. They are useful when you are starting a fresh bin and want to kickstart microbial activity faster than it would build on its own.
What I observed when I used an accelerator on a correctly balanced pile: activity started 3 to 5 days earlier than without it.
What I observed when I used an accelerator on a pile with wrong ratio or wrong moisture: nothing. The microbes had nowhere to work.
The fastest way to make compost faster at home is not an accelerator — it is getting the fundamentals right first.
My clear recommendation: fix the ratio, moisture, and aeration first. If the pile is still slow after a week, then consider an accelerator to jumpstart it. Buying an accelerator to fix a broken pile is the wrong order of operations.

balanced compost pile
Balanced adding of brown and green
Articles You may Like To read
Complete Home Vegetable Gardening Course – Soil – The Foundation of Growth
When Do Seedlings Need Fertilizer? Beginner’s Guide
Planting seedlings in containers
🌿 Things That Might Help
Some readers find useful resources below.
Take a look 👇
| Problem | What I Observed | What Fixed It |
|---|---|---|
| Bad smell | Too wet, anaerobic | Added dry leaves and cardboard, turned pile |
| No decomposition | Too dry, no microbial activity | Added water, turned and mixed |
| Fruit flies | Exposed kitchen waste on surface | Buried kitchen waste, covered with dry layer |
| Pile not heating up | Wrong ratio or pile too small | Adjusted carbon:nitrogen, increased pile volume |
| Pile heating then stopping | Moisture dropped or material became compacted | Added water, turned pile to reintroduce air |
What I Was Wrong About Initially
I used to think that adding more kitchen waste to the bin would speed composting up. More material, faster results — that logic made sense to me.
What actually happened: more waste without matching carbon just made the pile wetter, slower, and smellier. I was feeding the pile without giving the microbes what they needed to work.
The shift happened when I stopped thinking about composting as a disposal system and started thinking about it as a managed biological process. Ratio, moisture, and airflow are the three controls. Once I managed those consistently, composting became predictable.
I also used to think that a bad-smelling compost bin was just what composting smelled like. It is not. A well-managed compost pile smells like forest soil—earthy, clean, and slightly sweet. If yours smells like rot or ammonia, something is off in the balance. It is fixable.
I wasted years not knowing how to make compost faster at home because I was focused on adding more, not balancing better.

The 2–3–4 Method: Quick Recap
Fast composting is not about the right bin or the right product. It is about balance.
Get the carbon-to-nitrogen ratio right (3:1 is the target). Keep the moisture at a squeezed-sponge level. Turn every 3 to 4 days to keep oxygen in. Chop your material smaller. Keep the pile out of full direct sun.
Do those five things consistently and you will see heat in the pile within a week and finished compost in 4 to 6 weeks.
I spent years composting slowly because I skipped the fundamentals and kept looking for a shortcut. The method was always simple. It just needed to be followed correctly.
Everything I have shared here is what makes compost faster at home without any special equipment
If you have specific questions about your setup — what you are adding, why it is not heating, or what the smell means — drop them in the comments. I read every one.
FAQ
Compost stops heating up when the carbon-to-nitrogen ratio is off, moisture is too low, or the pile is too small. The minimum pile size for heat generation is about 3 cubic feet. Check moisture first — it should feel like a wrung-out sponge. Then adjust your ratio toward 3 parts dry material to 1 part kitchen waste.
Turning introduces oxygen, which keeps the aerobic decomposition process active and prevents bad odour. If you turn less frequently — once a week or less — composting still works but takes significantly longer. Daily turning is unnecessary and disrupts the microbial activity building up in the pile.
The ideal carbon-to-nitrogen ratio for home composting is 3:1 — three parts dry material like leaves or cardboard for every one part kitchen waste. The minimum that still works is 2:1. Too much nitrogen makes the pile wet and smelly. Too much carbon and nothing breaks down. Getting this ratio right is the single biggest factor in compost speed.
Compost accelerators work only when the pile is already balanced. They add concentrated microorganisms that kickstart activity, which can speed up the first 3 to 5 days. But if your carbon-to-nitrogen ratio is wrong or moisture is off, accelerators do almost nothing. Fix the fundamentals first. Use an accelerator only to jumpstart a correctly set-up pile, not to rescue a broken one.
Finished compost is dark brown, crumbly, and smells like forest soil — earthy and clean with no trace of rot. The original kitchen scraps and dry material are no longer recognizable. With correct management, this stage is typically reached between day 30 and day 40. If you can still identify what went in, it needs more time.
Bad-smelling compost is almost always caused by too much nitrogen-rich wet waste and not enough oxygen. When the pile goes anaerobic — meaning airflow is blocked — it produces a rotten or ammonia-like odour. Fix it by adding dry leaves or torn cardboard immediately, then turn the pile to reintroduce air. A well-managed compost pile should smell like soil, not rot.
🌿 What You’ll Need for This Method
- Cold-pressed neem oil –
View options on Amazon
- Sticky traps –
View options on Amazon
- Garden sprayer –
View options on Amazon
🌿 Things That Might Help
Some readers find useful resources below.
Take a look 👇

SnG Gardeners has 14+ years of hands-on home gardening experience growing food in containers and small spaces. He runs shashingautam.in and the YouTube channel "Shashi N Gautam Kitchen Gardeners" (163,000+ subscribers), where every technique and recommendation comes from real-world testing — not theory. When SnG writes about a method, it's one he's used, tracked, and would use again.
Essential Gardening Tips for Beginners: Complete Guide 2025
Complete step-by-step guide to urban container gardening, soil preparation, and growing fresh organic vegetables and fruits at home for beginner
Is Mosaic Virus or Leaf Curl Virus in Plants Treatable?
Aug
बिगिनर गाइड: अमरूद गमले में कैसे उगाये?
Jul
Powdery Mildew Control
Apr
Is Charcoal Good for Plants and Soil? The Complete Honest Answer
Jun
How to Make Organic Liquid Fertilizer from Mustard Cake — 5x More Potent
Nov
When Do Seedlings Need Fertilizer? Beginner’s Guide
Sep
6 Tips for Successful Germination Of Seeds
Oct
Big Pots vs Good Soil: Which Wins?
Aug
🌱 Plan Your First Garden – Easy Crops for Beginner Success! 🌱
Sep
How to Get Rid of Leaf Miners Naturally (5 Organic Methods That Work)
Mar
How to Grow Blueberries in Pots in India – Best Varieties, Chill Hours & Care Tips
Sep
Pusa Plant Nursery – New Delhi
Jul
Compost Branches & Twigs Without Shredder: Cow Urine + Hammer Method
May
How to Grow Strawberries in Pots — Complete Guide for Home Gardeners
Aug
Essential Gardening Tools for Beginners: Complete Guide 2025
Sep
Complete Home Vegetable Gardening Course – Soil – The Foundation of Growth
Sep